Tutorial kali ini adalah cara untuk menginstall Nextcloud di Debian 10 lengkap dengan PHP 7.3 MariaDB 10.3 dan Nginx 1.16.1, buat yang belum tau Nextcloud, Nextcloud adalah aplikasi berbasis web yang memudahkan untuk berbagi file bisa dibilang mirip dengan Google Drive, dengan kemudahan untuk mengatur akses per folder/group. Nextcloud banyak digunakan oleh perusahaan untuk mempermudah akses berbagi file.
Setting DNS
Arahkan A record DNS ke cloud.jaranguda.com
contoh
cloud.jaranguda.com IN A 100.101.102.103
ganti 100.101.102.103 dengan IP public server anda.
setting DNS ini sangat penting karena akan digunakan untuk mengaktifkan SSL.
Install Pertama
Pertama install beberapa paket untuk memperlancar instalasi tahap-tahap selanjutnya.
apt-get install curl gnupg2 ca-certificates socat unzip lsb-release -y
Install PHP
apt-get install php7.3 php7.3-cli php7.3-common php7.3-gd php7.3-xmlrpc php7.3-fpm \
        php7.3-curl php7.3-intl php-imagick php7.3-mysql php7.3-zip php7.3-xml \
        php7.3-mbstring php7.3-bcmath -y
Tweak PHP
Update timezone, tambah maksimum upload jadi 100 MB, tambah limit memory php jadi 512MB.
sed -i 's/;cgi.fix_pathinfo=1/cgi.fix_pathinfo=0/g' /etc/php/7.3/fpm/php.ini
sed -i 's/;date.timezone =/date.timezone = Asia\/Jakarta/g' /etc/php/7.3/fpm/php.ini
sed -i 's/post_max_size \=\ 8M/post_max_size \=\ 100M/g' /etc/php/7.3/fpm/php.ini
sed -i 's/upload_max_filesize \=\ 2M/upload_max_filesize \=\ 80M/g' /etc/php/7.3/fpm/php.ini
sed -i 's/memory_limit \=\ 128M/memory_limit \=\ 512M/g' /etc/php/7.3/fpm/php.ini
Install MariaDB
Install MariaDB 10.3 langsung dari repository Debian 10.
apt install mariadb-server -y
Buat User dan Database Nextcloud
Jalankan command mysql di terminal, lalu buat database dan user Nextcloud dengan copy paste dibawah ini
CREATE DATABASE nextcloud;
GRANT ALL PRIVILEGES ON nextcloud.* TO "nextcloud"@"localhost" IDENTIFIED BY "Kank4dcFKiXY9tjzgNmy";
Dari baris diatas nama database nextcloud, user nextcloud, password Kank4dcFKiXY9tjzgNmy. Ini bakalan kita gunakan sewaktu menginstall Nextcloud nanti.
Install Letsencrypt SSL
Untuk menginstall letsencrypt SSL kita akan menggunakan acme.sh. Terlebih dahulu install acme.sh dengan cara
mkdir ~/src
cd ~/src
wget https://github.com/acmesh-official/acme.sh/archive/2.8.5.tar.gz
tar zxvf 2.8.5.tar.gz
cd ~/src/acme.sh-2.8.5
bash acme.sh install
source ~/.bashrc
Generate SSL untuk domain cloud.jaranguda.com
acme.sh --issue -d cloud.jaranguda --standalone
disini kita tidak butuh webserver, dengan menjalankan perintah diatas kita akan menggunakan server bawaan acme.sh. acme.sh akan menggunakan port 80, pastikan port tersebut tidak digunakan agar proses generate SSL ini berhasil.
Setelah beberapa saat muncul pemberitahuan ssl berhasil dibuat
....
ORW+gtLyrjE6PlCWKTC4xD8a6M2gXy+23izGsX/cjIeV9izPQ7V0frwiH5GyOcWW
Mc6FIMV2kJwTvVB0rJS6MbUO/92cX0/QbFFaW2MdHqjcuMXiiPCrCVJmCXKvxH10
uoWiDEKtysEaLmjQQD63B3w0GI2IRDMtCZK+H5aTjA==
-----END CERTIFICATE-----
[Sat 21 Mar 2020 09:35:07 AM UTC] Your cert is in  /root/.acme.sh/cloud.jaranguda.com/cloud.jaranguda.com.cer
[Sat 21 Mar 2020 09:35:07 AM UTC] Your cert key is in  /root/.acme.sh/cloud.jaranguda.com/cloud.jaranguda.com.key
[Sat 21 Mar 2020 09:35:07 AM UTC] The intermediate CA cert is in  /root/.acme.sh/cloud.jaranguda.com/ca.cer
[Sat 21 Mar 2020 09:35:07 AM UTC] And the full chain certs is there:  /root/.acme.sh/cloud.jaranguda.com/fullchain.cer
Cara ini hanya perlu sekali dijalankan, karena untuk renew (perpanjang) SSL, acme.sh sudah menginstall crontab, bisa dilihat dengan crontab -l
# crontab -l
41 0 * * * "/root/.acme.sh"/acme.sh --cron --home "/root/.acme.sh" > /dev/null
Install NGINX
Khusus untuk nginx ini kita akan menggunakan nginx versi terbaru dari repository NGINX langsung, karena versi terbaru membawa beberapa perubahan penting seperti rate_limit
Jalankan perintah berikut ini dari command line (CLI)
wget -qO - http://nginx.org/keys/nginx_signing.key | apt-key add -
echo "deb http://nginx.org/packages/debian/ $(lsb_release -sc) nginx" >> /etc/apt/sources.list
apt update
apt install nginx -y
Tweak NGINX
Kita akan melakukan sedikit tweak di nginx, untuk menyesuaikan max upload dari PHP dan beberapa konfigurasi lainnya.
cat >/etc/nginx/nginx.conf <<'EOL'
user  www-data;
worker_processes  auto;
error_log  /var/log/nginx/error.log warn;
pid        /var/run/nginx.pid;
worker_rlimit_nofile 100000;
events {
    worker_connections  10000;
    use epoll;
    multi_accept on;
}

http {
    include       /etc/nginx/mime.types;
    default_type  application/octet-stream;
    log_format  main  '$remote_addr - $remote_user [$time_local] "$request" '
                      '$status $body_bytes_sent "$http_referer" '
                      '"$http_user_agent"';
    sendfile        on;
    tcp_nopush on;
    tcp_nodelay on;
    send_timeout 5;
    client_body_timeout 20;
    keepalive_timeout 40;
    server_tokens off;
    client_max_body_size 120M;

    gzip on;
    gzip_min_length 10240;
    gzip_comp_level 1;
    gzip_vary on;
    gzip_disable msie6;
    gzip_proxied expired no-cache no-store private auth;
    gzip_types
        text/css
        text/javascript
        text/xml
        text/plain
        text/x-component
        application/javascript
        application/x-javascript
        application/json
        application/xml
        application/rss+xml
        application/atom+xml
        font/truetype
        font/opentype
        application/vnd.ms-fontobject
        image/svg+xml;

    include /etc/nginx/sites/*.conf;
}
EOL
Buat folder untuk server block (vhost) nginx
mkdir -p /etc/nginx/sites/
Buat server block baru dengan nama cloud.jaranguda.com.conf. Ingat untuk mengganti cloud.jaranguda.com dengan nama domain anda.
upstream php-handler {
    server unix:/var/run/php/php7.3-fpm.sock;
}

server {
    listen 80;
    server_name cloud.jaranguda.com;
    # enforce https
    return 301 https://$server_name:443$request_uri;
}

server {
    listen 443 ssl http2;
    server_name cloud.jaranguda.com;
    ssl_certificate /root/.acme.sh/cloud.jaranguda.com/fullchain.cer;
    ssl_certificate_key /root/.acme.sh/cloud.jaranguda.com/cloud.jaranguda.com.key;

    add_header Referrer-Policy "no-referrer" always;
    add_header X-Content-Type-Options "nosniff" always;
    add_header X-Download-Options "noopen" always;
    add_header X-Frame-Options "SAMEORIGIN" always;
    add_header X-Permitted-Cross-Domain-Policies "none" always;
    add_header X-Robots-Tag "none" always;
    add_header X-XSS-Protection "1; mode=block" always;

    root /var/www/nextcloud;

    location = /robots.txt {
        allow all;
        log_not_found off;
        access_log off;
    }

    # The following 2 rules are only needed for the user_webfinger app.
    # Uncomment it if you're planning to use this app.
    #rewrite ^/.well-known/host-meta /public.php?service=host-meta last;
    #rewrite ^/.well-known/host-meta.json /public.php?service=host-meta-json last;

    # The following rule is only needed for the Social app.
    # Uncomment it if you're planning to use this app.
    #rewrite ^/.well-known/webfinger /public.php?service=webfinger last;

    location = /.well-known/carddav {
      return 301 $scheme://$host:$server_port/remote.php/dav;
    }
    location = /.well-known/caldav {
      return 301 $scheme://$host:$server_port/remote.php/dav;
    }

    # set max upload size
    client_max_body_size 512M;
    fastcgi_buffers 64 4K;

    # Enable gzip but do not remove ETag headers
    gzip on;
    gzip_vary on;
    gzip_comp_level 4;
    gzip_min_length 256;
    gzip_proxied expired no-cache no-store private no_last_modified no_etag auth;
    gzip_types application/atom+xml application/javascript application/json application/ld+json application/manifest+json application/rss+xml application/vnd.geo+json application/vnd.ms-fontobject application/x-font-ttf application/x-web-app-manifest+json application/xhtml+xml application/xml font/opentype image/bmp image/svg+xml image/x-icon text/cache-manifest text/css text/plain text/vcard text/vnd.rim.location.xloc text/vtt text/x-component text/x-cross-domain-policy;

    location / {
        rewrite ^ /index.php;
    }

    location ~ ^\/(?:build|tests|config|lib|3rdparty|templates|data)\/ {
        deny all;
    }
    location ~ ^\/(?:\.|autotest|occ|issue|indie|db_|console) {
        deny all;
    }

    location ~ ^\/(?:index|remote|public|cron|core\/ajax\/update|status|ocs\/v[12]|updater\/.+|oc[ms]-provider\/.+)\.php(?:$|\/) {
        fastcgi_split_path_info ^(.+?\.php)(\/.*|)$;
        set $path_info $fastcgi_path_info;
        try_files $fastcgi_script_name =404;
        include fastcgi_params;
        fastcgi_param SCRIPT_FILENAME $document_root$fastcgi_script_name;
        fastcgi_param PATH_INFO $path_info;
        fastcgi_param HTTPS on;
        # Avoid sending the security headers twice
        fastcgi_param modHeadersAvailable true;
        # Enable pretty urls
        fastcgi_param front_controller_active true;
        fastcgi_pass php-handler;
        fastcgi_intercept_errors on;
        fastcgi_request_buffering off;
    }

    location ~ ^\/(?:updater|oc[ms]-provider)(?:$|\/) {
        try_files $uri/ =404;
        index index.php;
    }

    # Adding the cache control header for js, css and map files
    # Make sure it is BELOW the PHP block
    location ~ \.(?:css|js|woff2?|svg|gif|map)$ {
        try_files $uri /index.php$request_uri;
        add_header Cache-Control "public, max-age=15778463";
        add_header Referrer-Policy "no-referrer" always;
        add_header X-Content-Type-Options "nosniff" always;
        add_header X-Download-Options "noopen" always;
        add_header X-Frame-Options "SAMEORIGIN" always;
        add_header X-Permitted-Cross-Domain-Policies "none" always;
        add_header X-Robots-Tag "none" always;
        add_header X-XSS-Protection "1; mode=block" always;
        access_log off;
    }

    location ~ \.(?:png|html|ttf|ico|jpg|jpeg|bcmap|mp4|webm)$ {
        try_files $uri /index.php$request_uri;
        # Optional: Don't log access to other assets
        access_log off;
    }
}
Install Nextcloud 18
Download Nextcloud versi terbaru dari nextcloud.com. Saat ini versi terbaru 18.0.2 bisa langsung di download dengan wget.
mkdir -p /var/www
cd /var/www
wget https://download.nextcloud.com/server/releases/nextcloud-18.0.2.zip
unzip nextcloud-18.0.2.zip
Ubah permission /var/www/nextcloud agar bisa dibaca user www-data
chown www-data:www-data -R /var/www/nextcloud
Install Nexcloud dari CLI
cd /var/www/nextcloud/
sudo -u www-data php occ maintenance:install --database "mysql" --database-name "nextcloud"  --database-user "nextcloud" --database-pass "Kank4dcFKiXY9tjzgNmy" --admin-user "jaranguda" --admin-pass "jaranguda123"
sesuaikan dengan credential dari MariaDB diatas. Ganti juga user admin jaranguda dan password jaranguda123
Set trusted domain Nextcloud
sudo -u www-data php occ config:system:set trusted_domains 1 --value=cloud.jaranguda.com
output perintah diatas
System config value trusted_domains => 1 set to string cloud.jaranguda.com
Jalankan PHP-FPM MariaDB NGINX
systemctl restart php7.3-fpm
systemctl restart mariadb
systemctl restart nginx
Jalankan PHP-FPM MariaDB NGINX waktu booting
systemctl enable php7.3-fpm
systemctl enable mariadb
systemctl enable nginx
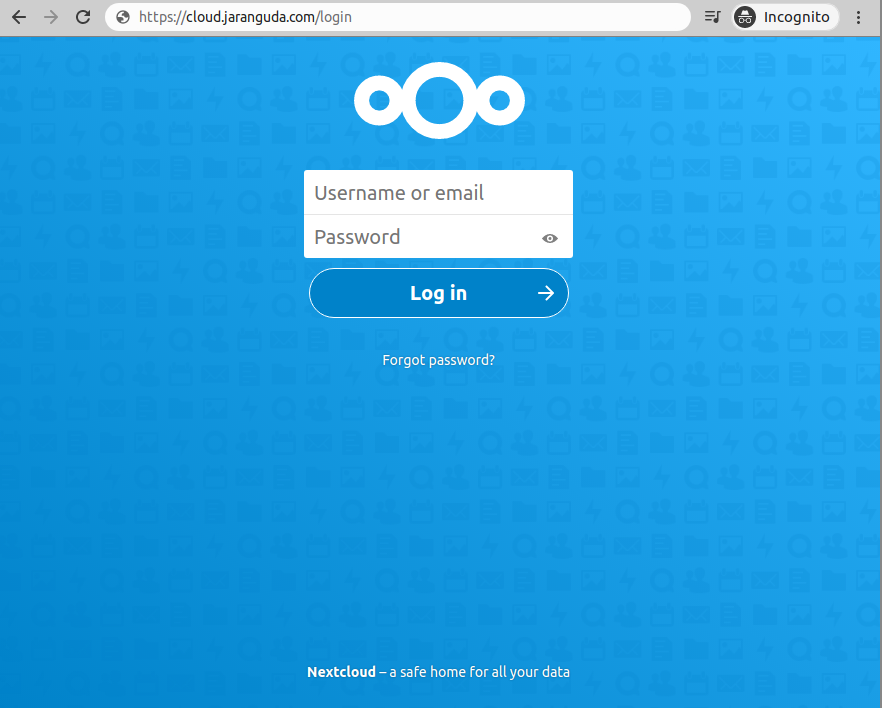
Buka di browser alamat https://cloud.jaranguda.com