SoftEther mudah untuk di install tetapi agak ribet konfigurasinya dengan hanya mengandalkan Linux server, kalau mengelolanya menggunakan Windows sangat mudah. Tutorial ini hanya akan menggunakan CLI (Command Line Interface) baik untuk konfigurasi dan instalasi SoftEther Server.
Server :
Debian 7
IP : 192.168.1.10
Client :
Fedora 20
IP : 192.168.1.11
Tahap 1 : Instalasi di Server Debian 7
Dibawah ini akan dijelaskan tahap pertahap instalasi SoftEther VPN Server di Debian 7 (sisi server). Bagian ini dibedakan dengan tahap 2 yang khusus untuk koneksi ke SoftEther VPN Server. Install aplikasi-aplikasi (dependencies) yang dibutuhkan untuk menginstall SoftEther.
apt-get update; apt-get install build-essential
Untuk memudahkan download file konfigurasi yang akan kita buat nantinya, kita akan menginstall Apache Web Server
apt-get install apache2Instalasi SoftEther VPN Server
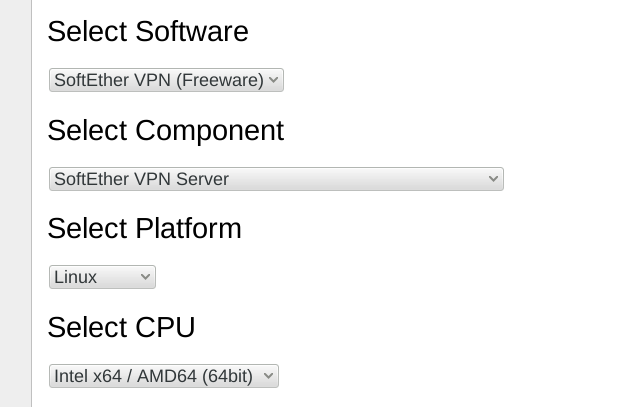
Download SoftEther di SoftEther Download Center. Untuk 32 Bit pilih Intel X86 (32 Bit) dibagian CPU.
Saat ini versi terbaru adalah v4.08-9449.
64 Bit
wget http://www.softether-download.com/files/softether/v4.08-9449-rtm-2014.06.08-tree/Linux/SoftEther%20VPN%20Server/64bit%20-%20Intel%20x64%20or%20AMD64/softether-vpnserver-v4.08-9449-rtm-2014.06.08-linux-x64-64bit.tar.gz
32 Bit
wget http://www.softether-download.com/files/softether/v4.08-9449-rtm-2014.06.08-tree/Linux/SoftEther%20VPN%20Server/32bit%20-%20Intel%20x86/softether-vpnserver-v4.08-9449-rtm-2014.06.08-linux-x86-32bit.tar.gz
pilih yang sudah stabil (stable). Karena versi beta kemungkinan masih banyak bug.
Ekstrak file yang baru di download ke folder /opt
tar zxvf softether-vpnserver-*.tar.gz -C /opt/
hasil ekstrak diatas menghasilkan folder bernama vpnserver di /opt (/opt/vpnserver/). Pindah ke folder vpnserver lalu install SoftEther
cd /opt/vpnserver/; make
Untuk pilihan
Do you want to read the License Agreement for this software ?
Did you read and understand the License Agreement ?
Did you agree the License Agreement ?
pilih 1. Yes. Jalankan SoftEther server
/opt/vpnserver/vpnserver start
Konfigurasi SoftEther VPN Server
Semua fungsi SoftEther bisa dikelola dari vpncmd. Untuk memulai konfigurasi jalankan vpncmd
/opt/vpnserver/vpncmd
Sebelum memulai konfigurasi, cek terlebih dahulu apakah server anda bisa menjalankan SoftEther dengan sempurna atau tidak. Setelah menjalankan vpncmd pilih 3. Use of VPN Tools (certificate creation and Network Traffic Speed Test Tool)
lalu eksekusi perintah Check
VPN Tools>Check
Check command - Check whether SoftEther VPN Operation is Possible
---------------------------------------------------
SoftEther VPN Operation Environment Check Tool
Copyright (c) SoftEther VPN Project.
All Rights Reserved.
If this operation environment check tool is run on a system and that system passes, it is most likely that SoftEther VPN software can operate on that system. This check may take a while. Please wait...
Checking 'Kernel System'...
              Pass
Checking 'Memory Operation System'...
              Pass
Checking 'ANSI / Unicode string processing system'...
              Pass
Checking 'File system'...
              Pass
Checking 'Thread processing system'...
              Pass
Checking 'Network system'...
              Pass

All checks passed. It is most likely that SoftEther VPN Server / Bridge can operate normally on this system.
The command completed successfully.
Bila anda mendapatkan All checks passed berarti SoftEther VPN Server bisa dijalankan dengan sempurna. Bila terdapat error silahkan kontak provider anda, bila menggunakan VPS (OpenVZ/XEN/KVM).
Membuat password Admin
Jalankan vpncmd. Pada pilihan
By using vpncmd program, the following can be achieved.
1. Management of VPN Server or VPN Bridge
2. Management of VPN Client
3. Use of VPN Tools (certificate creation and Network Traffic Speed Test Tool)
Select 1, 2 or 3:
pilih angka 1 lalu tekan enter. Pada bagian Hostname of IP Address of Destination masukkan localhost:5555 . Dibagian Specify Virtual Hub Name: tidak perlu diisi apapun, tekan enter, nanti akan muncul
VPN Server>eksekusi ServerPasswordSet, lalu masukkan password anda.
Membuat VirtualHub
Sebelum menambahkan user, terlebih dahulu buat VirtualHub. Sebagai contoh kita akan membuat VirtualHub bernama VirHub, pada vpncmd eksekusi
HubCreate VirHub
log perintah diatas
VPN Server>HubCreate VirHub
HubCreate command - Create New Virtual Hub
Please enter the password. To cancel press the Ctrl+D key.

Password: **********
Confirm input: **********


The command completed successfully.
Sekarang gunakan VirtualHub yang baru dibuat, untuk menambah user baru.
Hub VirHub
### log
Hub command - Select Virtual Hub to Manage
The Virtual Hub "VirHub" has been selected.
The command completed successfully.

VPN Server/VirHub>
Cara paling mudah untuk menghubungkan client dengan SoftEther server adalah dengan SecureNAT, maka kita akan menggunakan SecureNAT disini. Untuk mengaktifkannya jalankan
SecureNatEnable
### log
VPN Server/VirHub>SecureNatEnable
SecureNatEnable command - Enable the Virtual NAT and DHCP Server Function (SecureNat Function)
The command completed successfully.
Menambah User VPN
Format untuk menambah user
UserCreate user
sebagai contoh kita akan membuat user vpn01, pilihan lainnya biarkan kosong
UserCreate vpn01
### log
UserCreate command - Create User
Assigned Group Name:
User Full Name:
User Description:
The command completed successfully.
Agar aman, gunakan password untuk user vpn01. perintahnya UserPasswordSet vpn01
UserPasswordSet vpn01
### log
UserPasswordSet command - Set Password Authentication for User Auth Type and Set Password
Please enter the password. To cancel press the Ctrl+D key.
Password: **********
Confirm input: **********
The command completed successfully.
Aktifkan IPSec
IPsecEnable
IPsecEnable command - Enable or Disable IPsec VPN Server Function
Enable L2TP over IPsec Server Function (yes / no): yes
Enable Raw L2TP Server Function (yes / no): yes
Enable EtherIP / L2TPv3 over IPsec Server Function (yes / no): yes
Pre Shared Key for IPsec (Recommended: 9 letters at maximum): VirHubKey
Default Virtual HUB in a case of omitting the HUB on the Username: VirHub
The command completed successfully.
yang perlu di perhatikan adalah Default Virtual HUB isi dengan VirtualHub yang tadi sudah dibuat. Pre Shared Key bebas di isi maksimal 9.
Setelah semua konfigurasi selesai, sekarang kita akan membuat konfigurasi untuk OpenVPN. Generate sertifikat baru untuk server, perintah dibawah ini masih di jalankan di vpncmd. Contoh saya menggunakan hostname vpn.jaranguda.com
ServerCertRegenerate vpn.jaranguda.com
### log
ServerCertRegenerate command - Generate New Self-Signed Certificate with Specified CN (Common Name) and Register on VPN Server
A new server certificate has been set.
If you are using OpenVPN protocols, please mind that you may have to update the inline certificate data in the OpenVPN configuration file.
The command completed successfully.
Aktifkan OpenVPN di port 1194 (port default OpenVPN), bisa diganti dengan port lainnya.
OpenVpnEnable yes /PORTS:1194
### log
OpenVpnEnable command - Enable / Disable OpenVPN Clone Server Function
The command completed successfully.
Generate file konfigurasi untuk user vpn01
OpenVpnMakeConfig ~/vpn01.zip
### log
OpenVpnMakeConfig command - Generate a Sample Setting File for OpenVPN Client
The sample setting file was saved as "~/vpn01.zip". You can unzip this file to extract setting files.
The command completed successfully.
sangat disayangkan OpenVpnMakeConfig tidak bisa secara langsung menyimpan file konfigurasi ke (misalkan) /var/www. Pindahkan file vpn01.zip tersebut ke /var/www
mv ~/vpn01.zip /var/www/
Tahap 2 : Instalasi OpenVPN di Fedora 20
Kita akan melakukan koneksi ke SoftEther server dengan menggunakan OpenVPN. Install openvpn di Fedora
yum install openvpn -y
Download file konfigurasi yang tadi sudah dibuat
wget http://192.168.1.10/vpn01.zip
ekstrak file tersebut
unzip vpn01.zip
### log
Archive:  vpn01.zip
 extracting: readme.txt
 extracting: readme.pdf
 extracting: vpn_openvpn_remote_access_l3.ovpn
 extracting: vpn_openvpn_site_to_site_bridge_l2.ovpn
kita menggunakan vpn_openvpn_remote_access_l3.ovpn :)
su -c "openvpn --config *openvpn_remote_access_l3.ovpn"
pada
Enter Auth Username:vpn01
### vpn01 adalah user yang tadi dibuat di server
Enter Auth Password:
### password untuk user vpn01
koneksi yang berhasil ada pesan “Initialization Sequence Completed”. Log lengkapnya
[fedora@homeserver]$ su -c "openvpn --config  *openvpn_remote_access_l3.ovpn"
Password:
Tue Jul 22 23:42:40 2014 OpenVPN 2.3.2 x86_64-redhat-linux-gnu [SSL (OpenSSL)] [LZO] [EPOLL] [PKCS11] [eurephia] [MH] [IPv6] built on Sep 12 2013
Enter Auth Username:vpn01
Enter Auth Password:
Tue Jul 22 23:42:46 2014 WARNING: No server certificate verification method has been enabled.  See http://openvpn.net/howto.html#mitm for more info.
Tue Jul 22 23:42:46 2014 Socket Buffers: R=[212992->131072] S=[212992->131072]
Tue Jul 22 23:42:46 2014 UDPv4 link local: [undef]
Tue Jul 22 23:42:46 2014 UDPv4 link remote: [AF_INET]192.168.1.10:1194
Tue Jul 22 23:42:46 2014 TLS: Initial packet from [AF_INET]192.168.1.10:1194, sid=132adec4 1f0413ea
Tue Jul 22 23:42:46 2014 WARNING: this configuration may cache passwords in memory -- use the auth-nocache option to prevent this
Tue Jul 22 23:42:47 2014 VERIFY OK: depth=0, CN=lateng.ndikkar.com, O=lateng.ndikkar.com, OU=lateng.ndikkar.com, C=US
Tue Jul 22 23:42:47 2014 Data Channel Encrypt: Cipher 'AES-128-CBC' initialized with 128 bit key
Tue Jul 22 23:42:47 2014 Data Channel Encrypt: Using 160 bit message hash 'SHA1' for HMAC authentication
Tue Jul 22 23:42:47 2014 Data Channel Decrypt: Cipher 'AES-128-CBC' initialized with 128 bit key
Tue Jul 22 23:42:47 2014 Data Channel Decrypt: Using 160 bit message hash 'SHA1' for HMAC authentication
Tue Jul 22 23:42:47 2014 Control Channel: TLSv1, cipher TLSv1/SSLv3 DHE-RSA-AES256-SHA, 2048 bit RSA
Tue Jul 22 23:42:47 2014 [lateng.ndikkar.com] Peer Connection Initiated with [AF_INET]192.168.1.10:1194
Tue Jul 22 23:42:49 2014 SENT CONTROL [lateng.ndikkar.com]: 'PUSH_REQUEST' (status=1)
Tue Jul 22 23:42:51 2014 PUSH: Received control message: 'PUSH_REPLY,ping 3,ping-restart 10,ifconfig 192.168.30.13 192.168.30.14,dhcp-option DNS 192.168.30.1,route-gateway 192.168.30.14,redirect-gateway def1'
Tue Jul 22 23:42:51 2014 OPTIONS IMPORT: timers and/or timeouts modified
Tue Jul 22 23:42:51 2014 OPTIONS IMPORT: --ifconfig/up options modified
Tue Jul 22 23:42:51 2014 OPTIONS IMPORT: route options modified
Tue Jul 22 23:42:51 2014 OPTIONS IMPORT: route-related options modified
Tue Jul 22 23:42:51 2014 OPTIONS IMPORT: --ip-win32 and/or --dhcp-option options modified
Tue Jul 22 23:42:51 2014 ROUTE_GATEWAY 192.168.1.254/255.255.255.0 IFACE=wlp3s0 HWADDR=74:2f:68:b5:1b:f8
Tue Jul 22 23:42:51 2014 TUN/TAP device tun0 opened
Tue Jul 22 23:42:51 2014 TUN/TAP TX queue length set to 100
Tue Jul 22 23:42:51 2014 do_ifconfig, tt->ipv6=0, tt->did_ifconfig_ipv6_setup=0
Tue Jul 22 23:42:51 2014 /usr/sbin/ip link set dev tun0 up mtu 1500
Tue Jul 22 23:42:51 2014 /usr/sbin/ip addr add dev tun0 local 192.168.30.13 peer 192.168.30.14
Tue Jul 22 23:42:51 2014 /usr/sbin/ip route add 192.168.1.10/32 via 192.168.1.254
Tue Jul 22 23:42:51 2014 /usr/sbin/ip route add 0.0.0.0/1 via 192.168.30.14
Tue Jul 22 23:42:51 2014 /usr/sbin/ip route add 128.0.0.0/1 via 192.168.30.14
Tue Jul 22 23:42:51 2014 Initialization Sequence Completed
Sekian ;).