
Didalam proses instalasi ini kita akan menggunakan Debian dan Windows 7. Debian sebagai tempat instalasi SoftEther dan Windows 7 sebagai tempat konfigurasinya. Ditutorial berikutnya kita akan menggunakan Linux tanpa kebutuhan akan Windows.
Instalasi SoftEther di Debian
Instalasi ini bisa dijalankan di Debian semua versi, tetapi versi yang direkomendasikan adalah Debian 7. Sama seperti semua proses instalasi update terlebih dahulu repo dan install build-essential untuk mempermudah proses compilasi dan instalasi. Login ke server lalu jalankan perintah
su -c "apt-get update; apt-get install build-essential"
bila diminta password masukkan password anda. Bila anda menggunakan Debian 32 Bit download
mkdir ~/vpnku
wget http://www.softether-download.com/files/softether/v2.00-9387-rtm-2013.09.16-tree/Linux/SoftEther%20VPN%20Server/32bit%20-%20Intel%20x86/softether-vpnserver-v2.00-9387-rtm-2013.09.16-linux-x86-32bit.tar.gz
Debian 64 Bit
mkdir ~/vpnku
wget http://www.softether-download.com/files/softether/v2.00-9387-rtm-2013.09.16-tree/Linux/SoftEther%20VPN%20Server/64bit%20-%20Intel%20x64%20or%20AMD64/softether-vpnserver-v2.00-9387-rtm-2013.09.16-linux-x64-64bit.tar.gz
Bila anda bingung apakah anda menggunakan 64 bit atau 32 Bit bisa dicek dengan
uname -ahasil yang keluar
Linux TuxVPN 2.6.32-042stab079.5 #1 SMP Fri Aug 2 17:16:15 MSK 2013 i686 GNU/Linux
berarti menggunakan 32 bit, bila yang keluar x86_64 berarti anda menggunakan 64 Bit. Untuk amannya anda bisa menggunakan versi 32 bit, karena compatible dengan 32 dan 64 Bit. Untuk selanjutkan kita akan membahas hanya di 32 bit, untuk 64 bit hanya ada perbedaan sedikit. Ekstrak file yang baru di download
cd ~/vpnku;
tar zxvf softether-vpnserver-v2.00-9387-rtm-2013.09.16-linux-x86-32bit.tar.gz
hasil ekstrak tersebut akan menghasilkan folder vpnserver, pidah ke folder tersebut dan install Softether
cd vpnserver
## atau
cd ~/vpnku/vpnserver
# lalu jalankan perintah
make
Jalankan VPN Server
./vpnserver startSebelum bisa menambah client VPN terlebih dahulu buat password admin untuk VPN Server. Jalankan perintah dibawah ini
./vpncmd
vpncmd command - SoftEther VPN Command Line Management Utility
SoftEther VPN Command Line Management Utility (vpncmd command)
Version 2.00 Build 9387   (English)
Compiled 2013/09/16 12:45:42 by yagi at pc25
Copyright (c) SoftEther Project. All Rights Reserved.

By using vpncmd program, the following can be achieved.

1. Management of VPN Server or VPN Bridge
2. Management of VPN Client
3. Use of VPN Tools (certificate creation and Network Traffic Speed Test Tool)

Select 1, 2 or 3: 1
pada pilihan diatas masukkan 1 dan tekan enter. Bagian selanjutnya masukkan ip server anda dengan portnya contoh IP server anda 192.168.1.1 port 5555. Gunakan saja port 5555 :)
Specify the host name or IP address of the computer that the destination VPN Server or VPN Bridge is operating on.
By specifying according to the format 'host name:port number', you can also specify the port number.
(When the port number is unspecified, 443 is used.)
If nothing is input and the Enter key is pressed, the connection will be made to the port number 8888 of localhost (this computer).
Hostname of IP Address of Destination: 192.168.1.1:5555
selanjutnya, tidak usah diisi apa-apa, tinggal tekan saja enter.
If connecting to the server by Virtual Hub Admin Mode, please input the Virtual Hub name.
If connecting by server admin mode, please press Enter without inputting anything.
Specify Virtual Hub Name:
selanjutnya anda masuk ke vpn commandline sebagai Admin, ketik ServerPasswordSet dan tekan enter untuk membuat password
You have administrator privileges for the entire VPN Server.

VPN Server>ServerPasswordSet
Sampai disini tahap instalasi sudah selesai, Sekarang kita akan menambahkan user baru agar bisa konek ke SoftEther VPN Server.
Konfigurasi di Windows 7
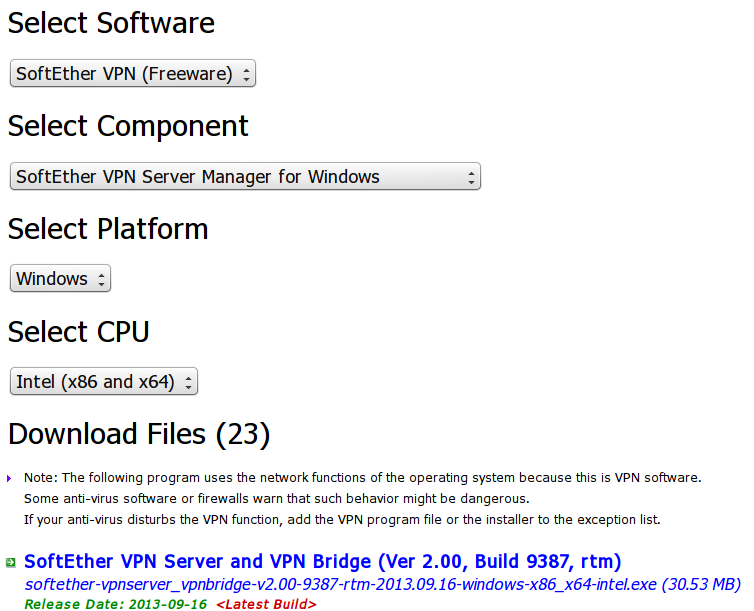
Download SoftEther VPN Server Manager Untuk Windows di http://softether-download.com/en.aspx
install File yang anda download tersebut. Setelah selesai buka aplikasi SoftEther VPN Server Manager.

Klik New Setting, di window selanjutnya yang perlu diisikan :
Setting Name : VPNKu
Host Name (IP Server) : 192.168.1.1
Port Number : 5555
Password : password yang anda buat seperti diatas
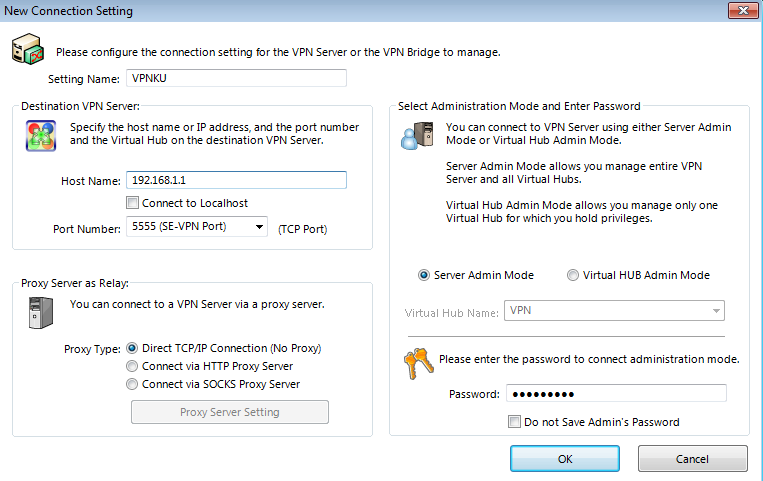
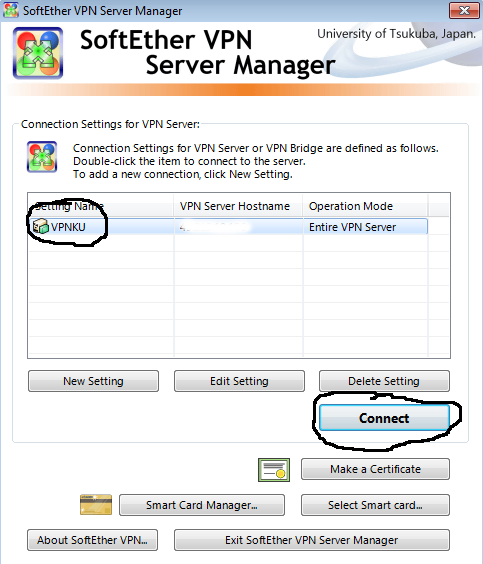
akhiri dengan mengklik tombol OK. Klik pada Setting Name yang baru anda buat lalu klik tombol connect
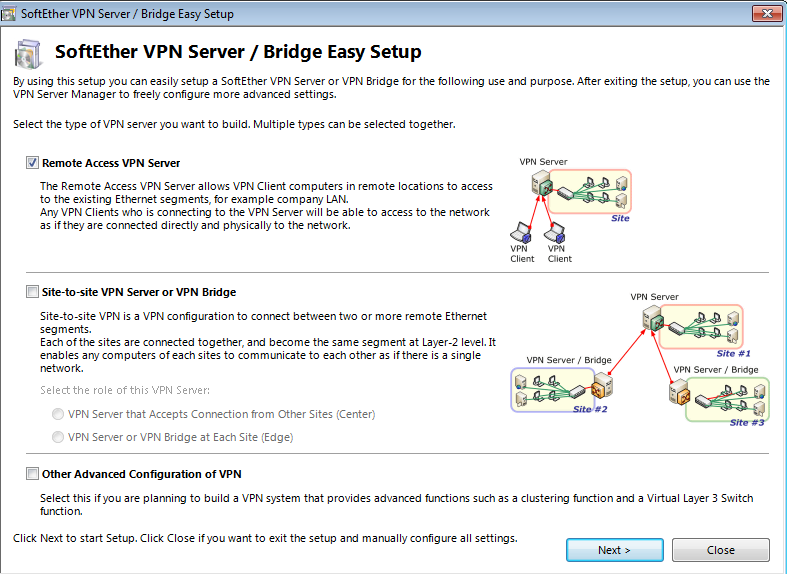
Bridge easy setup Pilih Remote Access VPN Server klik Next
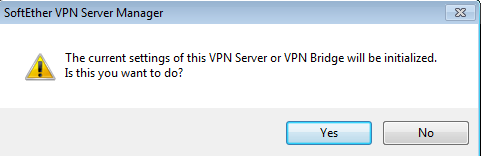
klik Yes
Isikan Virtual Hub Name, lalu klik OK

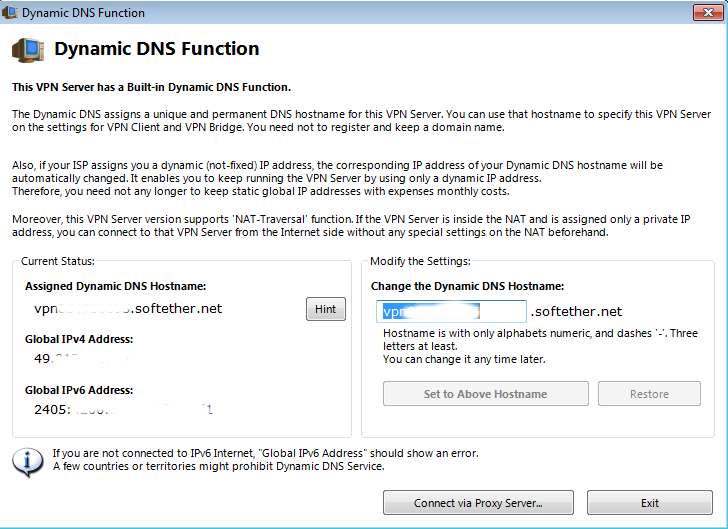
Dynamic DNS Solutin, disini biarkan saja nilai defaultnya lalu klik Exit.
VPN Azure pilih Disable VPN Azure, klik OK

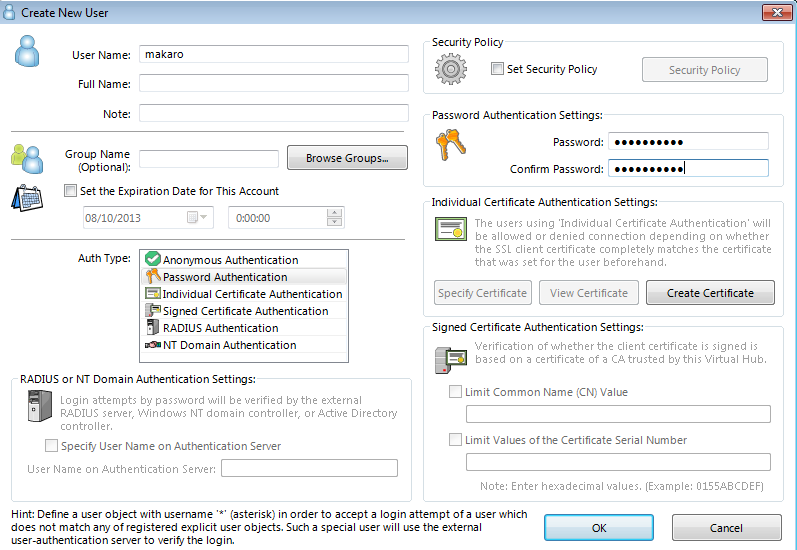
klik Create New User. Pada window manage user klik New

Create new user,yang wajib diisi Username dan Password, klik OK
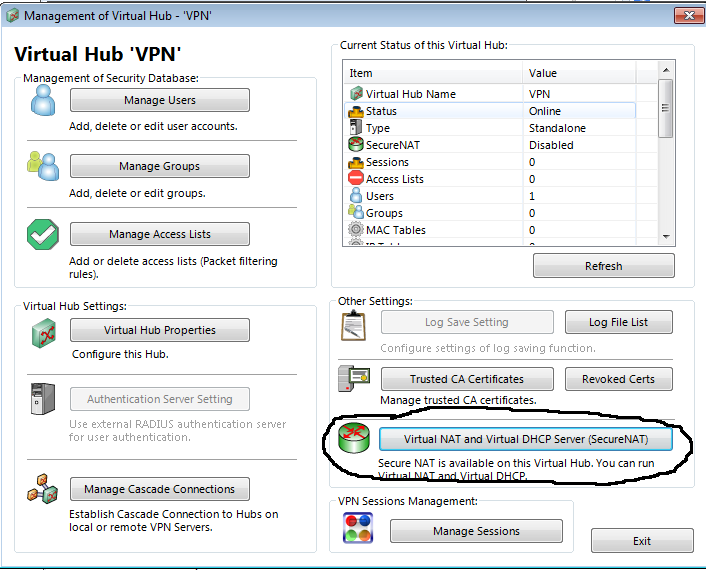
Exit Manage User. Pilih virtual Hub name dan klik Manage Virtual Hub

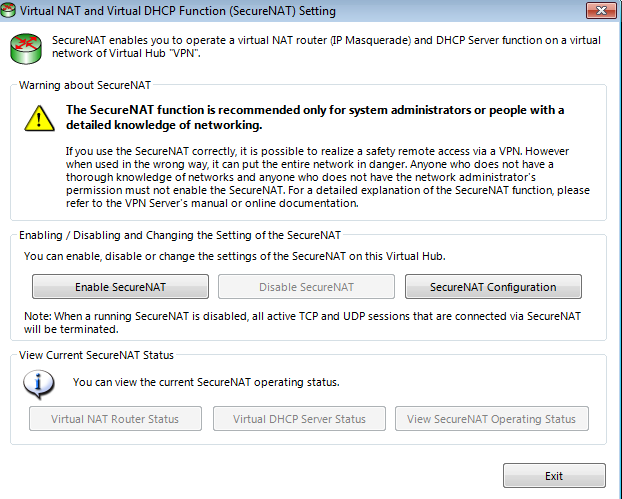
Management Of Virtual Hub, klik Virtual Nat and Virtual DHCP Server
Virtual Nat and Virtual DHCP Server klik Enable Secure NAT
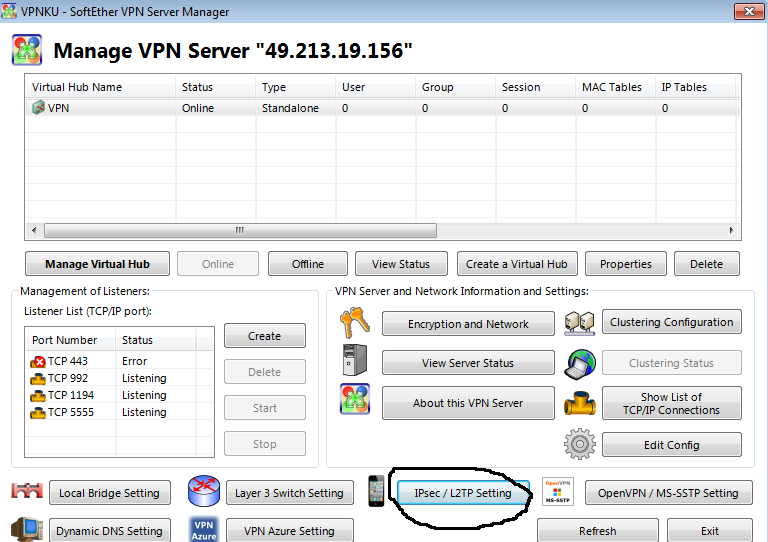
Pada window Manage VPN Server klik IPSec /L2TP Setting
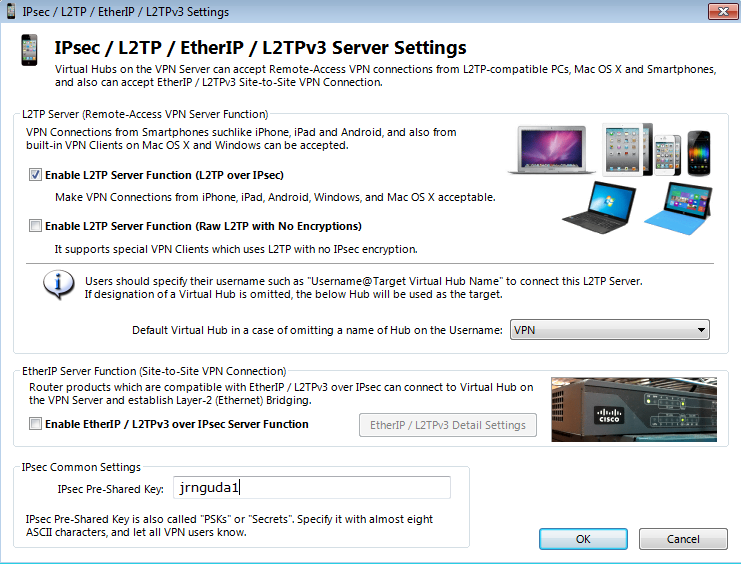
Pilih Enable L2TP Server Function, lalu masukkan IPsec Pre-shared key, maximal 8 karakter.
 .
.
Konfigurasi sudah selesai silahkan gunakan VPN anda ;) Untuk koneksi ke VPN dari Windows, Linux dan Android bisa dilihat di tutorial dibawah ini :
– Cara Koneksi Ke SoftEther dari Windows
– Cara Koneksi Ke SoftEther dari Android
– Cara Koneksi Ke SoftEther dari Linux
sekali lagi makasih y
sangat bermanfaat sekali terimakasih buat yang udah posting tentang ini
siap laksanakan bang.. :)
Eh… Bage Me ngo mantap ban ndu tutorialna EE tom… hahahahaa